
Air Conditioning Installation: A Step-by-Step Process
Before any AC unit is installed, a pre-installation HVAC inspection is essential. This step ensures that the home’s structure, insulation, existing ductwork, and electrical systems are ready to support a new air conditioning system. Skipping this inspection can lead to improper setup, increased energy costs, and frequent breakdowns.
One of the most critical aspects during this stage is AC system sizing. Choosing the correct AC unit size for your home isn’t just about picking the biggest or most powerful system available. An oversized or undersized unit can result in poor AC efficiency, uneven cooling, and higher utility bills.
HVAC professionals perform Manual J calculations to accurately determine the correct AC sizing. This method involves a detailed assessment of the home’s square footage, window size, insulation levels, and even the number of occupants. A proper home assessment for AC installation ensures the AC unit is tailored to the space’s specific needs, promoting better energy savings and enhanced comfort.
Step 01: Installation Process for Different Types of Air Conditioners
Each system—whether it’s a central AC, split unit, or ductless mini-split—has unique requirements, from ductwork to electrical setup. Understanding these differences helps you better prepare for a smooth, efficient installation. Here’s how the process differs for each type:
1. Central Air Conditioning Systems
- Ductwork Installation: Central AC units require an extensive ductwork inspection and often, new ducts or modifications to existing ducts. This process involves ensuring that the ducts are properly sized for the system and that they are well-sealed to prevent energy loss.
- Sizing and System Efficiency: Proper AC system sizing is critical here. The technician performs Manual J calculations to determine the correct AC unit size for the home, ensuring the system is capable of efficiently cooling the entire space.
- Electrical Setup: Central systems typically require a dedicated circuit and significant wiring, as they are more powerful than smaller systems. The electrical panel connection must be checked to ensure that sufficient amperage is available.
2. Ductless Mini-Split Systems
- No Ducts Required: One of the main advantages of ductless systems is that they do not require any ductwork. Installation is less invasive, with the system consisting of an indoor unit mounted in the desired room and an outdoor compressor connected by refrigerant lines.
- Quick and Flexible Installation: The absence of ducts allows for faster and more flexible installation. The technician focuses on ensuring the optimal placement of the indoor units and ensuring airflow optimization.
- Electrical Considerations: The electrical requirements are usually less demanding than for central AC, though proper wiring must still be done to ensure efficient operation.
3. Window Air Conditioners
- Simpler Installation: Window units are the simplest type of AC to install. The unit fits into an open window, with minimal installation required. The process involves securing the unit in place and sealing any gaps to prevent air leaks and maximize AC efficiency.
- Power Supply: These units usually plug directly into a standard outlet, so no major electrical work is required. However, the placement of the unit should be carefully considered to avoid obstructing airflow.
4. Portable Air Conditioners
- Minimal Installation: Portable air conditioners are incredibly easy to install. The main task involves setting up the exhaust hose and venting it through a window or door. This type of system is perfect for renters or people in need of temporary cooling solutions.
- Flexible Placement: Since these units are portable, you can move them around as needed. However, it’s still important to position them properly for optimal airflow and cooling efficiency.
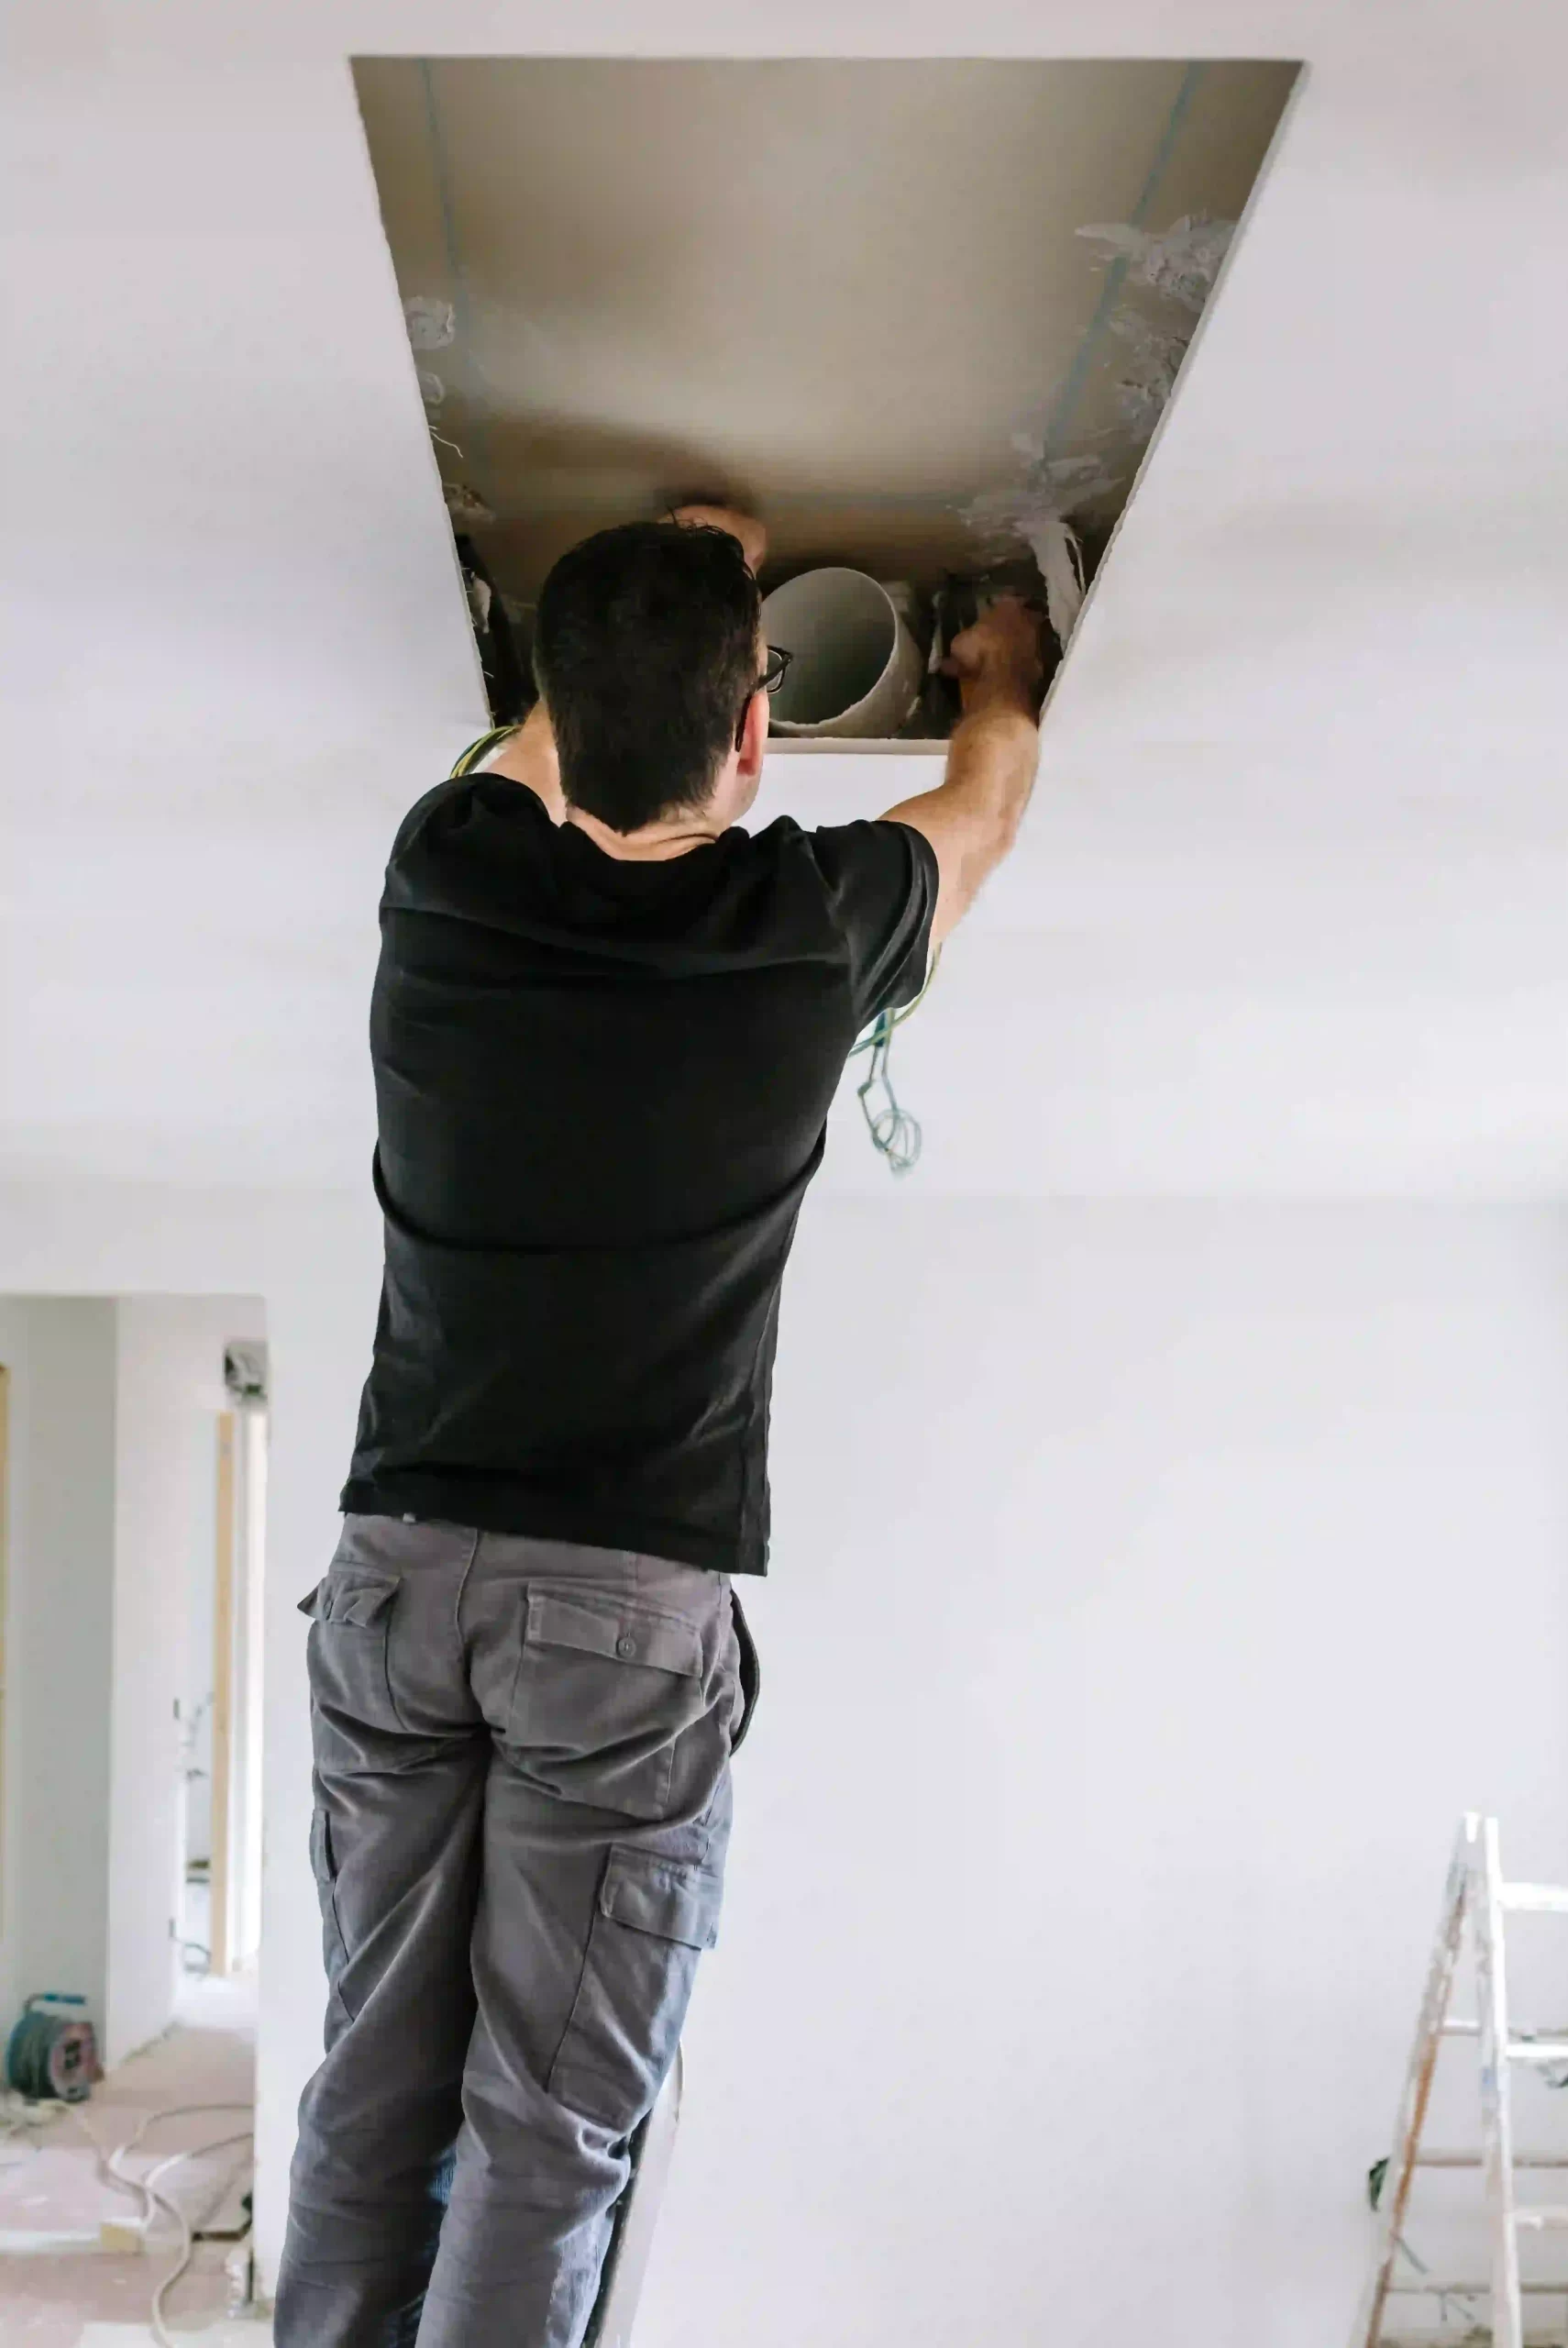
Step 02: Evaluating and Modifying Ductwork
After the pre-installation inspection, the next crucial phase is ductwork inspection. Technicians thoroughly assess the existing ducts to check for leaks, blockages, or damage that could hinder the performance of the new AC unit. Properly functioning ductwork is key to ensuring the system operates efficiently and provides consistent cooling.
Depending on the home’s needs, professionals might recommend upgrading to flexible ducts or rigid ducting. Flexible ducts are easier to install in tight spaces and are cost-effective, while rigid ducting tends to be more durable and offers better airflow over long distances. Both options have their pros and cons, and the choice often depends on the structure of the home and specific cooling requirements.
Sealing ducts for AC efficiency is another critical step. Any leaks in the duct system can cause cooled air to escape, reducing the AC efficiency and increasing energy bills. Technicians use professional duct sealing methods, such as mastic sealant or metal-backed tapes, to close gaps and ensure optimal airflow.
In addition to sealing, duct insulation plays a major role in airflow optimization. Proper insulation prevents temperature loss as air travels through the ducts, especially in unconditioned spaces like attics or basements. This not only enhances energy savings but also improves the cooling capacity of the system.
Improving Airflow Efficiency
By combining thorough ductwork inspection, careful duct sealing, and proper duct insulation, technicians can significantly enhance the airflow optimization. This ensures the cooled air reaches every room efficiently, boosting the overall performance of the new AC system and contributing to long-term energy-efficient AC operation.
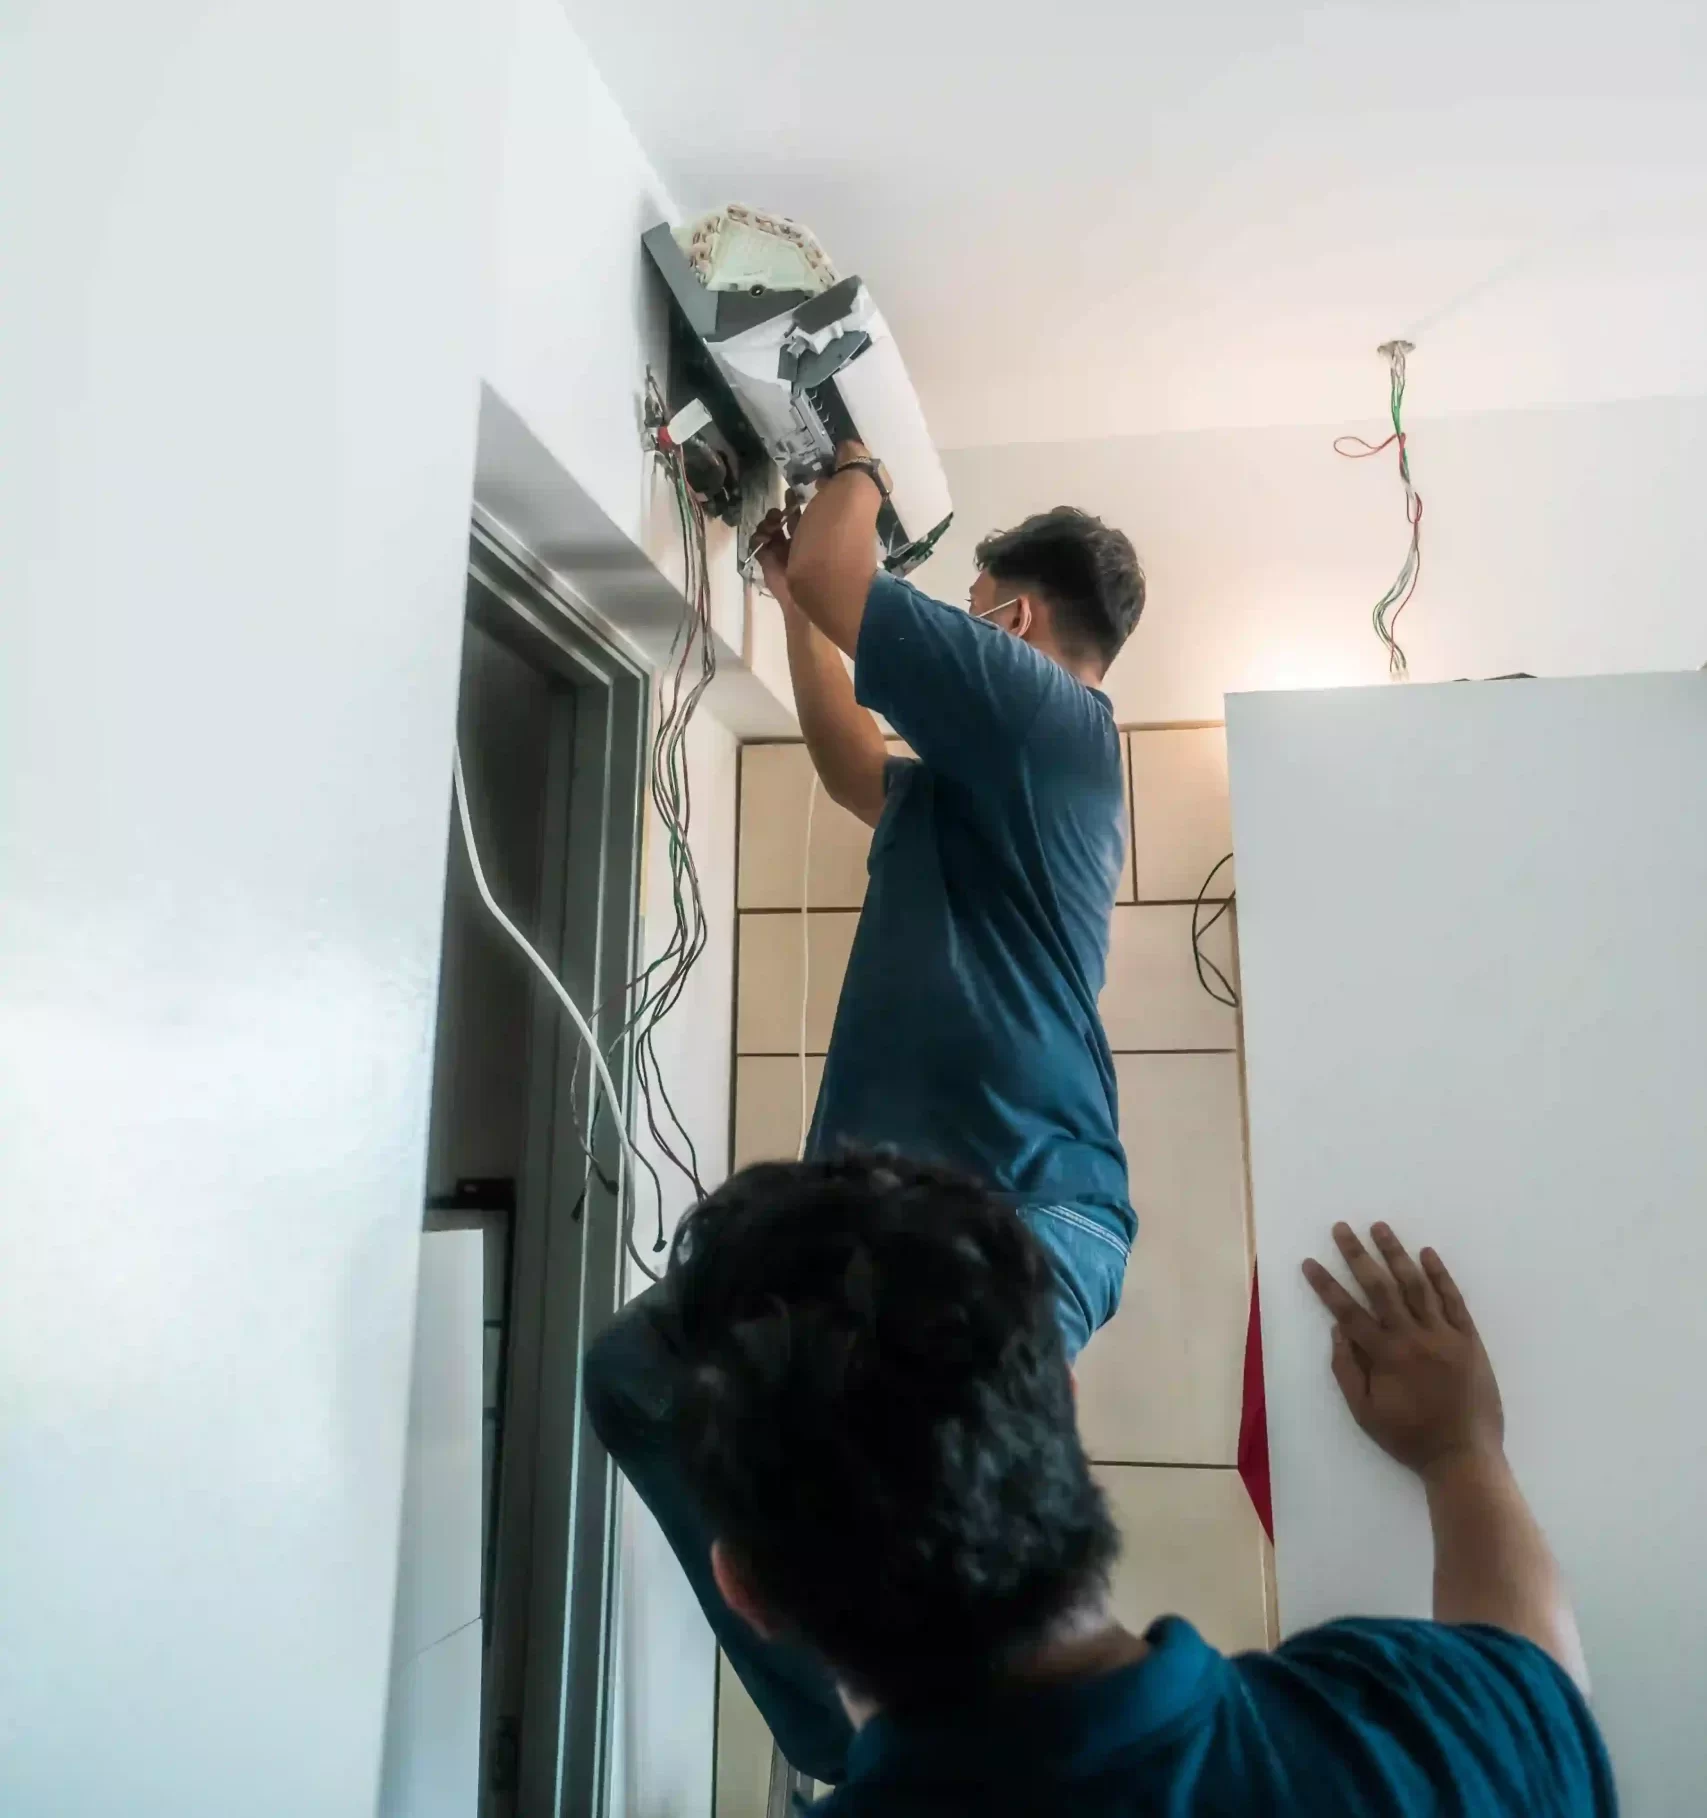
Step 03: Mounting and Placement of the AC Unit
Once the ductwork is ready, it’s time to focus on AC mounting. Proper AC unit placement plays a major role in how efficiently the system will run and how long it will last. During installation, technicians carefully select the best location to maximize airflow optimization, ensure easy access for future maintenance, and allow proper drainage of condensation.
Choosing the right spot isn’t just about convenience. The unit must have enough clearance on all sides to let air circulate freely. Restricted airflow can cause the AC to overwork, lowering its lifespan and energy efficiency. Outdoor units, in particular, should be placed on a stable, level surface that protects against flooding and minimizes exposure to direct sunlight.
Considerations for AC Placement
When planning space-saving AC installation, technicians look at several factors:
- Airflow optimization: Keeping vents and the surrounding area unobstructed improves cooling efficiency.
- Accessibility: Proper secure AC installation ensures that maintenance tasks like filter changes and system inspections can be performed easily.
- Structural support: Indoor units are mounted securely on walls that can bear their weight without vibration or noise issues.
- Drainage: Correct angling and drainage setup prevent water leaks and damage to the home.
In short, thoughtful optimal AC placement ensures the AC system runs smoothly, consumes less energy, and stays in top condition for years.
Step:04 Electrical Connections and Power Supply
Proper Wiring for Safe Operation
After securely mounting the AC unit, the next step is setting up the AC electrical wiring. A reliable and safe power supply is essential for the efficient operation of your air conditioning system. Technicians ensure that the voltage requirements and amperage needs match the specifications of the new AC unit. Using incorrect wiring or insufficient power can lead to system failures, increased fire risk, and voided warranties.
For AC installation following electrical safety is non-negotiable. Licensed electricians make sure that all work aligns with electrical code compliance for AC, adhering to national and local standards. Proper grounding, correct wire sizing, and safe connections are critical to prevent electrical hazards and ensure the long-term reliability of the system.
Electrical Panel and Circuit Breakers
Another vital step is the electrical panel connection. The AC unit must have a dedicated circuit that can handle its load without tripping the breaker. Professionals inspect the home’s electrical panel to verify whether the available amperage is sufficient. If not, upgrades may be necessary to meet the new unit’s voltage requirements and amperage demands.
Installing the correct circuit breakers and making secure panel connections ensures that the AC system will operate safely and efficiently. In the end, attention to electrical code compliance for AC and proper setup protects both your investment and your home.
Step 05: Installing Refrigerant Lines and Insulation
Refrigerant Line Installation
With the electrical setup complete, the next focus is refrigerant line installation. These lines are responsible for carrying refrigerant between the indoor and outdoor units of the AC system. Proper installation is critical because even minor errors can lead to leaks, reduced cooling efficiency, or even complete system failure.
Technicians carefully measure and fit the lines, ensuring minimal bends to maintain the smooth flow of refrigerant. AC refrigerant system reliability depends on precision at this stage. Once installed, the system undergoes leak testing to verify that all connections are secure and free from any refrigerant leaks. Early detection of leaks not only protects the environment but also enhances the AC’s performance and lifespan.
Leak Prevention and Insulation
Refrigerant insulation is just as important as the line installation itself. Without it, refrigerant lines are vulnerable to temperature fluctuations, which can lower system efficiency and increase energy costs. Insulating refrigerant lines for efficiency ensures that the refrigerant maintains the right temperature as it travels, reducing energy loss and preventing condensation buildup.
Effective refrigerant leak prevention and insulation protect the AC system from damage and maintain optimal cooling performance, helping homeowners achieve long-term energy savings.
Step 06: Condensate Drain Setup and Moisture Management
Condensate Drain Line Setup
Another essential part of the AC installation process is the condensate drain installation. As the AC cools the air, it also removes moisture, which needs to be efficiently drained away to prevent buildup. Technicians carefully plan and complete the condensate line setup for AC, ensuring the line slopes correctly to allow gravity to move the water out without pooling.
Proper moisture drainage is critical to prevent internal damage to the AC system and maintain a healthy indoor environment. A poorly installed drain line can lead to leaks, water backup, and system shutdowns.
Preventing Water Damage
Effective AC water management doesn’t just protect the AC unit — it also safeguards the property. Without a well-placed condensate drain system, excess moisture can cause mold, mildew, and even structural damage to walls, floors, and ceilings.
By focusing on water damage prevention during installation, technicians help homeowners avoid costly repairs down the line. A professionally installed drain line ensures consistent moisture control, keeping the home safe, dry, and comfortable.
Step 07: System Testing, Calibration, and Performance Check
Testing System Performance
After installation is complete, the next step is system testing to ensure everything operates correctly. Technicians begin by performing a refrigerant level check to confirm that the AC has the right amount of refrigerant for optimal cooling. Incorrect levels can lead to poor performance and higher energy consumption.
Next, they focus on airflow verification by measuring the air pressure and flow through the ducts and vents. Proper airflow ensures that each room in the home receives consistent cooling. In addition, thermostat calibration is performed to make sure the thermostat accurately reads and controls the indoor temperature, providing both comfort and energy efficiency.
Ensuring Optimal Efficiency
Once all tests are complete, an AC performance check is done. Technicians observe the system during operation to ensure that the cooling efficiency matches the system specifications. They fine-tune settings if necessary to achieve the best possible performance.
A thoroughly tested and calibrated system not only ensures a comfortable indoor environment but also helps maximize energy savings, reduce wear and tear on components, and extend the life of the AC unit.
Step 08: Permits, Code Compliance, and Final Checklist
Understanding Local HVAC Codes and Permits
No AC installation is complete without addressing HVAC permits and building codes for AC installation. In states like California, strict California HVAC regulations require contractors to obtain permits before beginning work. These permits ensure the installation meets safety standards, energy efficiency requirements, and environmental guidelines.
Adhering to local codes protects homeowners from potential fines and ensures that the system is installed safely and legally. Whether it’s a new installation or a replacement, following HVAC installation code compliance is crucial.
Environmental Regulations
Today’s AC installations must also comply with refrigerant compliance regulations. With older refrigerants like R-22 being phased out due to their harmful environmental effects, technicians must use approved, eco-friendly refrigerants and handle them properly to avoid leaks. Following environmental standards helps reduce the system’s carbon footprint and supports a cleaner, greener future.
Final Checklist
Before wrapping up the job, technicians complete a final inspection. This checklist ensures the AC unit and all components meet building codes, permit requirements, and system performance standards. Only after passing this comprehensive review is the installation officially complete — providing homeowners with peace of mind that their new system is efficient, safe, and fully compliant.
Step 09: Post-installation Services and Maintenance
Warranties and Post-installation Support
Once your AC system is installed, it’s important to understand the AC warranty coverage. Most reputable contractors provide warranties on both the AC unit and labor, ensuring protection against manufacturing defects or installation issues. Some companies also offer post-installation AC servicing, including initial maintenance checks within the first year to verify system performance.
Having access to post-installation support ensures that any minor adjustments needed after the system settles are handled promptly, keeping your home cool and comfortable without interruption.
Annual Maintenance and Tune-ups
Regular annual HVAC servicing is crucial for the long-term health of your system. Scheduling HVAC tune-ups helps maintain AC efficiency, extend the unit’s lifespan, and catch potential issues before they turn into expensive repairs. AC maintenance typically includes cleaning coils, checking refrigerant levels, inspecting the thermostat, and verifying system controls.
By committing to regular AC check-ups, homeowners can enjoy energy savings and optimal cooling performance year after year, making it a smart investment in both comfort and cost efficiency.
Step 10: Cost Breakdown of Standard AC Installation
Understanding Installation Costs
When considering a new AC installation, it’s essential to understand the overall AC installation cost. This includes several factors that contribute to the final price. Here’s a general cost breakdown for a typical installation:
- Labor: Professional installation can account for a significant portion of the cost, including the technician’s time, expertise, and equipment needed for proper setup.
- Materials: This includes the cost of the AC unit, refrigerant lines, ducts, insulation, and any other necessary parts.
- Electrical Work: Wiring the unit and ensuring the correct amperage is supplied typically adds to the cost.
- Refrigerant: The type and amount of refrigerant required can impact pricing, especially with eco-friendly options or if the system requires a refrigerant phase-out.
- Permits: Obtaining the necessary HVAC permits and ensuring compliance with local regulations, such as those in California, also adds to the cost.
Factors Affecting Pricing
Several variables influence the average cost of AC installation:
- Unit Size: Larger systems or those with higher cooling capacity generally come at a higher cost due to the increased materials and labor required for installation.
- Complexity of Ductwork: Homes with complicated or outdated duct systems may require additional work to optimize airflow, which can increase labor and materials costs.
- Home Needs: If the home requires additional equipment, such as enhanced insulation or a new electrical panel, the overall installation price will be higher.
Ultimately, understanding these factors helps homeowners anticipate costs and make informed decisions about their AC installation pricing. At HVAC Now California, we understand that the installation process can vary significantly depending on the type of air conditioner you’re installing.
Frequently Asked Questions (FAQ) About AC Installation
1. How do I know if my AC unit is the right size?
Proper AC system sizing is crucial for efficient operation. To determine the correct AC unit size for a home, a professional technician performs Manual J calculations and a home assessment for AC installation. These calculations consider factors like square footage, insulation, and local climate to ensure the system meets your cooling needs without wasting energy.
2. Can I install an AC system myself?
Central AC systems use a network of ducts to cool the entire home, while ductless mini-split systems provide targeted cooling to individual rooms. Mini-splits are more energy-efficient for smaller spaces or homes without existing ductwork. They are also easier to install and offer flexibility, especially in homes with limited space for ducts.
3. What’s the difference between central AC and ductless mini-splits?
Central AC systems use a network of ducts to cool the entire home, while ductless mini-split systems provide targeted cooling to individual rooms. Mini-splits are more energy-efficient for smaller spaces or homes without existing ductwork. They are also easier to install and offer flexibility, especially in homes with limited space for ducts.
4. How do I maintain my new AC unit?
To keep your AC system running efficiently, schedule annual HVAC servicing and regular AC maintenance. Simple tasks like replacing the filter, cleaning the coils, and checking refrigerant levels can improve performance. Don’t forget to book HVAC tune-ups regularly to extend the unit’s life and maintain optimal efficiency.
5. What should I do before the technician arrives for installation?
Before installation, clear the area around where the AC unit will be. Make sure there is enough space for the technician to work on ductwork inspection, electrical connections, and refrigerant lines. It’s also helpful to have any required documents, such as HVAC permits or home assessments, ready for the technician.
6. How long does AC installation take?
The typical AC installation time can range from a few hours to a full day, depending on the complexity of the installation. Factors like the size of the unit, ductwork modifications, and electrical requirements can all influence how long the job will take. Your technician will provide an estimated time during the pre-installation consultation.
7. Are there any environmental regulations for refrigerants?
Yes, refrigerants must comply with environmental standards, particularly regarding the phase-out of older refrigerants like R-22. Technicians will ensure that the system uses eco-friendly refrigerants and handles them safely to protect both the environment and your home.
8. What should I expect during the post-installation inspection?
The final inspection ensures that the installation meets HVAC installation code compliance and passes regulatory checks. Technicians will confirm that the system is operating correctly, including checking refrigerant levels, airflow verification, and thermostat calibration to ensure optimal cooling efficiency.