Air Conditioning Installation
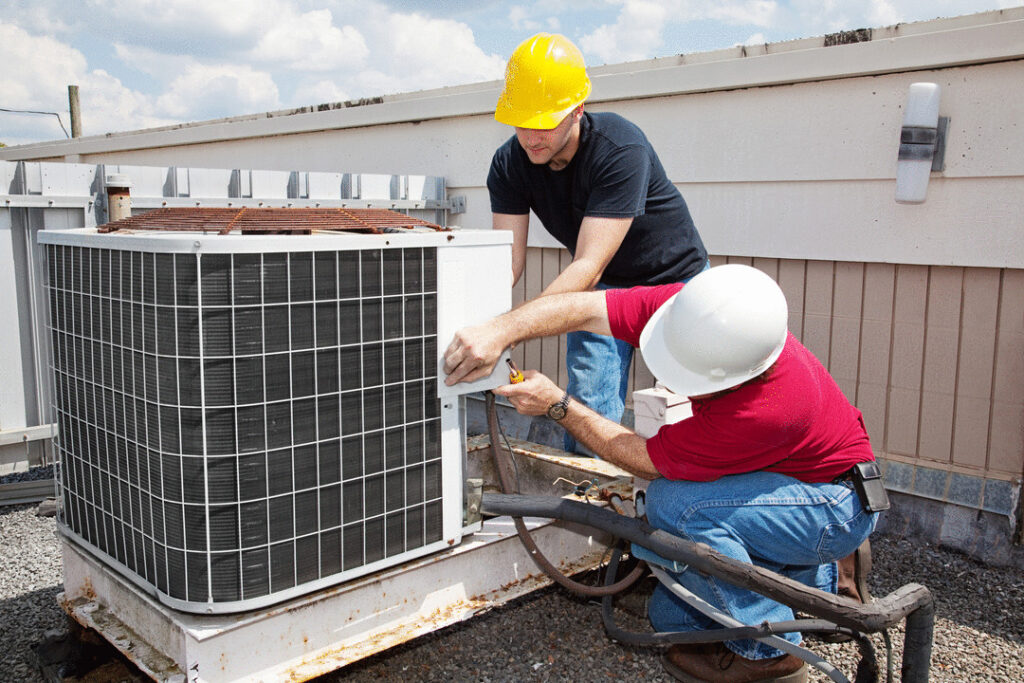
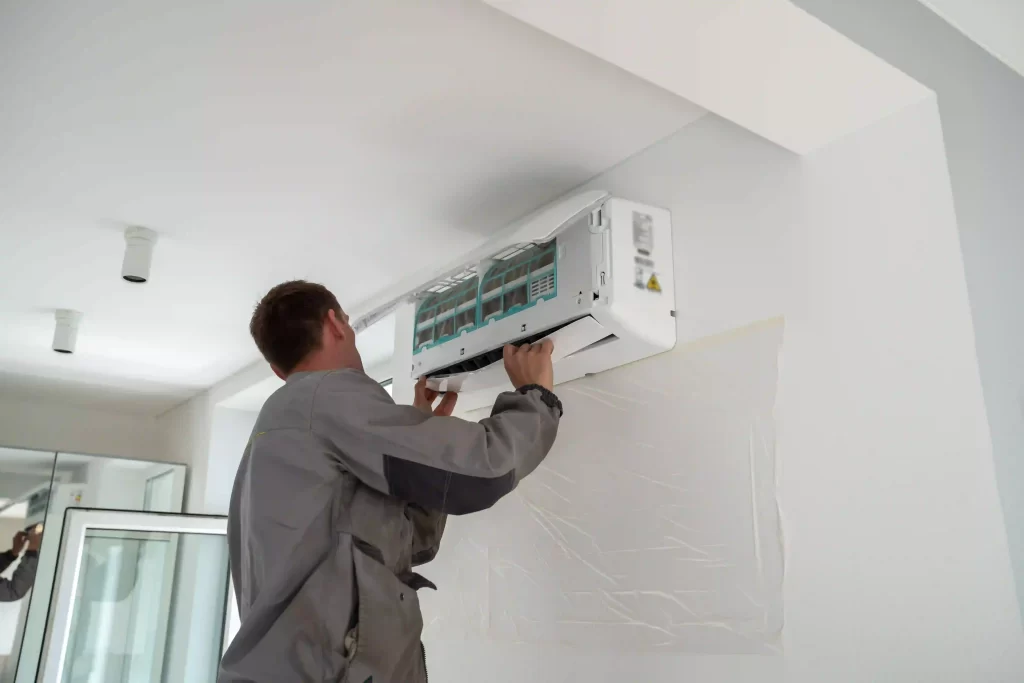
Air Conditioning Installation: A Step-by-Step Process Before any AC unit is installed, a pre-installation HVAC inspection is essential. This step ensures that the home’s structure, insulation, existing ductwork, and electrical systems are ready to support a new air conditioning system. Skipping this inspection can lead to improper setup, increased energy costs, and frequent breakdowns. One of the most critical aspects during this stage is AC system sizing. Choosing the correct AC unit size for your home isn’t just about picking the biggest or most powerful system available. An oversized or undersized unit can result in poor AC efficiency, uneven cooling, and higher utility bills. HVAC professionals perform Manual J calculations to accurately determine the correct AC sizing. This method involves a detailed assessment of the home’s square footage, window size, insulation levels, and even the number of occupants. A proper home assessment for AC installation ensures the AC unit is tailored to the space’s specific needs, promoting better energy savings and enhanced comfort. Step 01: Installation Process for Different Types of Air Conditioners Each system—whether it’s a central AC, split unit, or ductless mini-split—has unique requirements, from ductwork to electrical setup. Understanding these differences helps you better prepare for a smooth, efficient installation. Here’s how the process differs for each type: 1. Central Air Conditioning Systems Ductwork Installation: Central AC units require an extensive ductwork inspection and often, new ducts or modifications to existing ducts. This process involves ensuring that the ducts are properly sized for the system and that they are well-sealed to prevent energy loss. Sizing and System Efficiency: Proper AC system sizing is critical here. The technician performs Manual J calculations to determine the correct AC unit size for the home, ensuring the system is capable of efficiently cooling the entire space. Electrical Setup: Central systems typically require a dedicated circuit and significant wiring, as they are more powerful than smaller systems. The electrical panel connection must be checked to ensure that sufficient amperage is available. 2. Ductless Mini-Split Systems No Ducts Required: One of the main advantages of ductless systems is that they do not require any ductwork. Installation is less invasive, with the system consisting of an indoor unit mounted in the desired room and an outdoor compressor connected by refrigerant lines. Quick and Flexible Installation: The absence of ducts allows for faster and more flexible installation. The technician focuses on ensuring the optimal placement of the indoor units and ensuring airflow optimization. Electrical Considerations: The electrical requirements are usually less demanding than for central AC, though proper wiring must still be done to ensure efficient operation. 3. Window Air Conditioners Simpler Installation: Window units are the simplest type of AC to install. The unit fits into an open window, with minimal installation required. The process involves securing the unit in place and sealing any gaps to prevent air leaks and maximize AC efficiency. Power Supply: These units usually plug directly into a standard outlet, so no major electrical work is required. However, the placement of the unit should be carefully considered to avoid obstructing airflow. 4. Portable Air Conditioners Minimal Installation: Portable air conditioners are incredibly easy to install. The main task involves setting up the exhaust hose and venting it through a window or door. This type of system is perfect for renters or people in need of temporary cooling solutions. Flexible Placement: Since these units are portable, you can move them around as needed. However, it’s still important to position them properly for optimal airflow and cooling efficiency. Step 02: Evaluating and Modifying Ductwork After the pre-installation inspection, the next crucial phase is ductwork inspection. Technicians thoroughly assess the existing ducts to check for leaks, blockages, or damage that could hinder the performance of the new AC unit. Properly functioning ductwork is key to ensuring the system operates efficiently and provides consistent cooling.Depending on the home’s needs, professionals might recommend upgrading to flexible ducts or rigid ducting. Flexible ducts are easier to install in tight spaces and are cost-effective, while rigid ducting tends to be more durable and offers better airflow over long distances. Both options have their pros and cons, and the choice often depends on the structure of the home and specific cooling requirements.Sealing ducts for AC efficiency is another critical step. Any leaks in the duct system can cause cooled air to escape, reducing the AC efficiency and increasing energy bills. Technicians use professional duct sealing methods, such as mastic sealant or metal-backed tapes, to close gaps and ensure optimal airflow.In addition to sealing, duct insulation plays a major role in airflow optimization. Proper insulation prevents temperature loss as air travels through the ducts, especially in unconditioned spaces like attics or basements. This not only enhances energy savings but also improves the cooling capacity of the system.Improving Airflow EfficiencyBy combining thorough ductwork inspection, careful duct sealing, and proper duct insulation, technicians can significantly enhance the airflow optimization. This ensures the cooled air reaches every room efficiently, boosting the overall performance of the new AC system and contributing to long-term energy-efficient AC operation. Step 03: Mounting and Placement of the AC Unit Once the ductwork is ready, it’s time to focus on AC mounting. Proper AC unit placement plays a major role in how efficiently the system will run and how long it will last. During installation, technicians carefully select the best location to maximize airflow optimization, ensure easy access for future maintenance, and allow proper drainage of condensation. Choosing the right spot isn’t just about convenience. The unit must have enough clearance on all sides to let air circulate freely. Restricted airflow can cause the AC to overwork, lowering its lifespan and energy efficiency. Outdoor units, in particular, should be placed on a stable, level surface that protects against flooding and minimizes exposure to direct sunlight. Considerations for AC Placement When planning space-saving AC installation, technicians look at several factors: Airflow optimization: Keeping vents and the surrounding area unobstructed improves cooling efficiency. Accessibility: Proper secure AC installation
Air Conditioning Installation Read More »